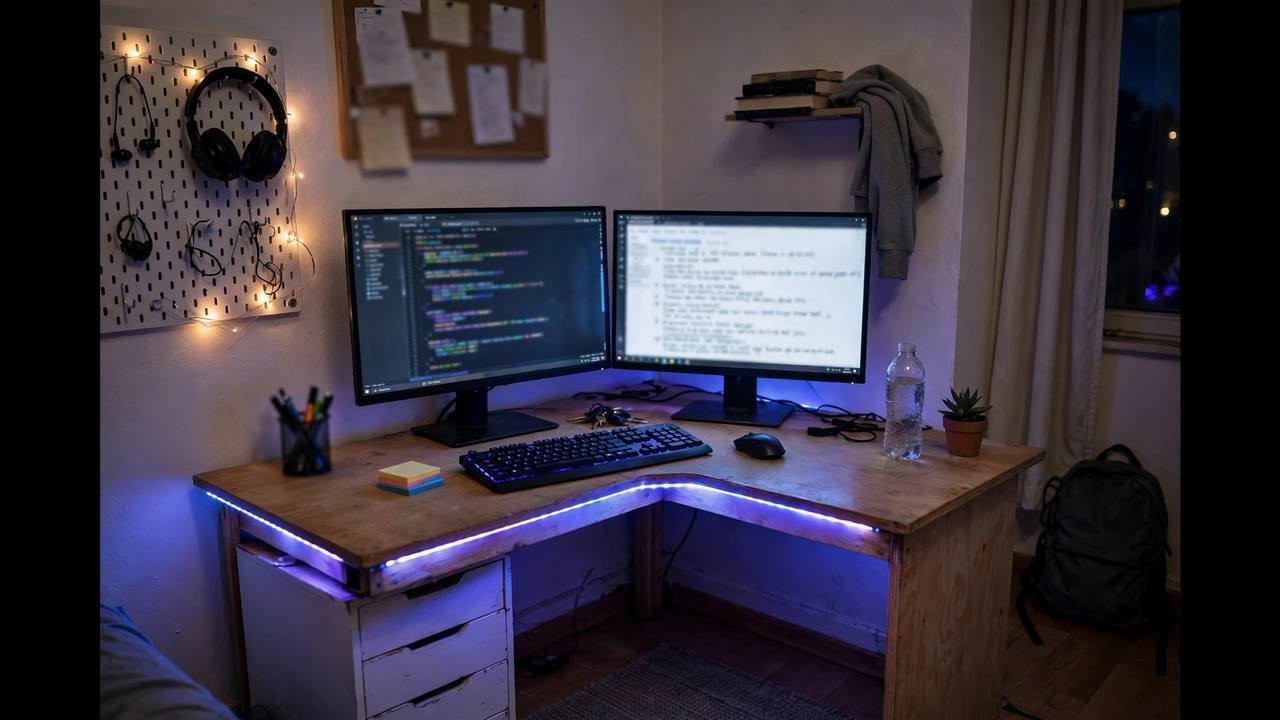
Dual monitor study station budget australia? A dual monitor setup students love is the most underrated productivity upgrade in online learning. Research consistently shows that extra screen space reduces the constant window-switching that fragments concentration — lecture on one screen, notes on the other; readings on the left, essay on the right; Zoom class here, shared document there. The good news for Australian students: you do not need a $1,000 ultrawide or matching premium displays. A sensible dual-monitor study station can be built for a few hundred dollars, much of it second-hand. This guide covers what to buy, how to connect it, how to arrange it, and the budget tricks that keep costs down.
Why Two Screens Change How You Study
On a single laptop screen, studying is an exercise in alt-tabbing: the lecture disappears when you open your notes, the readings vanish when you open the essay, the Zoom window covers the document you are discussing. Every switch costs a few seconds and — more importantly — breaks your train of thought. Studies of knowledge workers repeatedly find meaningful productivity gains from larger display setups, and students report the same subjective experience: less friction, fewer lost windows, better focus.
The concrete study workflows that two screens enable:
- Lecture + notes: Video lecture on one screen, OneNote or Docs on the other. No more pausing to switch windows.
- Readings + essay: PDF on the left, your draft on the right. Referencing becomes glance-and-type instead of scroll-and-forget.
- Class + collaboration: Zoom on one screen, the shared document or whiteboard on the other.
- Research + writing: Browser with sources on one side, your work on the other.
- Code + output: For programming students, editor on one screen and running program or documentation on the other is transformative.
Dual Monitor Setup Students: What You Actually Need
The shopping list is shorter than you think:
- A monitor: 24 inches, 1080p, IPS panel is the sweet spot for students. IPS gives better viewing angles and colour than cheaper TN panels — important when the monitor sits slightly off-centre. 24″ at 1080p is sharp enough at desk distance; 27″ is nicer but costs more and needs more desk space.
- A way to connect it: Check what ports your laptop has (HDMI, USB-C, DisplayPort) and what the monitor accepts. A cable is $15–$30. If your laptop only has USB-C, you may need a USB-C to HDMI cable or a small dock.
- Optional: keyboard, mouse and stand. A laptop stand ($25–$50) raises the laptop screen to match the monitor height; an external keyboard and mouse ($40–$80 wireless set) complete the desktop experience.
That is genuinely it. No special software, no powerful computer required — any laptop made in the last decade can drive an external 1080p monitor.
Buying the Monitor: New vs Second-Hand in Australia
New budget monitors (24″, 1080p, IPS) from brands like AOC, Philips, MSI and BenQ regularly sell for $150–$220 AUD at JB Hi-Fi, Officeworks, Umart, Scorptec and Amazon AU. Watch for sales — monitors are frequently discounted 20–30% during back-to-school, EOFY and Black Friday periods. At this price, buying new gets you a warranty and a perfect panel.
Second-hand monitors are the budget king. Quality 24″ 1080p monitors sell for $50–$100 on Facebook Marketplace and Gumtree in every Australian city — offices regularly offload fleets of Dell, HP and Lenovo monitors that are cosmetically worn but functionally perfect. What to check when buying used:
- Ask for a photo of it powered on displaying something (reveals dead pixels and damage).
- Test before paying if collecting in person — bring your laptop and a cable.
- Check the stand adjusts (tilt at minimum) and the ports match your cable.
- Corporate Dell/HP/Lenovo monitors are the safest used buys — built to last, with standard mounts.
- Avoid monitors with cracked screens (obviously), heavy backlight bleed, or missing power supplies (replacements can cost more than the monitor).
What about using a TV? A spare TV works in a pinch via HDMI, but TVs have higher input lag, worse text sharpness and usually sit too far away for desk use. Fine as a temporary third screen for videos; poor as a daily text monitor.
Connecting Everything: Cables, Ports and Docks
Connection is where students get confused, but it is simple once you map your ports:
- HDMI to HDMI: The most common. A standard HDMI cable from laptop to monitor. Carries video and audio.
- USB-C to HDMI/DisplayPort: For modern ultrabooks with only USB-C. Make sure the cable supports video (not all USB-C cables do — look for “DisplayPort Alt Mode” support).
- USB-C dock: One cable from laptop to dock, then the dock connects to monitor, keyboard, mouse, ethernet and power. $60–$150 for a decent one. The elegant solution if you connect/disconnect daily — one plug instead of four.
- DisplayPort: Common on desktop-oriented monitors; some laptops have mini-DisplayPort. Electrically similar to HDMI for student purposes.
After connecting, configure the display. On Windows: press Win+P and choose “Extend” (not “Duplicate” — duplicating shows the same image on both screens, defeating the purpose). Then go to Settings > System > Display to arrange the screens to match their physical layout (drag the rectangles so your mouse moves naturally between them) and set the external monitor as your main display if you prefer. Microsoft’s official guide to setting up dual monitors on Windows walks through this with screenshots. On Mac: System Settings > Displays, click Arrange, and drag to match your layout; uncheck “Mirror Displays”.
Set the correct resolution and refresh rate for the monitor (usually auto-detected, but verify — a monitor running at the wrong resolution looks blurry). If text looks fuzzy, check the scaling settings: 100% scaling on a 24″ 1080p monitor is correct; higher scaling makes everything comically large.
Arranging Your Study Station Ergonomically
Two screens badly arranged cause neck pain. The ergonomic basics:
- Primary screen directly in front at arm’s length, top of the screen at or slightly below eye level. The secondary screen goes to the side, angled slightly toward you.
- Match heights: A laptop screen sits much lower than a monitor. A laptop stand (or a stack of textbooks — the classic student solution) raises it to alignment. Mismatched heights mean constant neck tilting.
- Which screen is primary? Put your main work (essay, code, notes) on the screen directly in front; reference material (lecture, readings, chat) on the side screen.
- Distance: About an arm’s length (50–70cm) for 24″ monitors. If you lean in to read, increase text scaling instead of moving closer.
- Lighting: No window directly behind the screens (glare) or directly behind you (silhouette on webcam). Side lighting is ideal.
- Webcam placement: With an external monitor, your laptop webcam may now point at the ceiling from its stand. Either use the laptop screen for video calls or add an external webcam on the monitor — our webcam guide covers the options.
Dual Monitor Setup Students: Three Budget Builds
Under $100 — the scavenger build: Second-hand 24″ monitor from Marketplace ($50–$80), HDMI cable you already own or $15 from Kmart, textbooks as a laptop stand (free). Total: under $100 for a genuine dual-screen setup. This is the build most students should start with.
$200–$350 — the sensible build: New 24″ 1080p IPS monitor on sale ($150–$200), basic laptop stand ($30), wireless keyboard and mouse set ($50). Reliable, warrantied, comfortable for daily use through your whole degree.
$400–$600 — the comfortable build: 27″ 1440p monitor ($300–$400 on sale — noticeably sharper for text), USB-C dock ($80–$120) for one-cable connection, proper adjustable stand or monitor arm ($50–$100). Genuinely delightful to use; justifiable if you spend 6+ hours daily at the desk.
Beyond $600 you hit diminishing returns for study — the money is better spent on the laptop itself, a good chair, or a proper microphone. If you are buying the laptop too, see our best laptops for online study guide first, since the laptop is the bigger decision.
Monitor Arms, Cable Management and Small Desks
A monitor arm ($40–$90 for a single arm) clamps to your desk and holds the monitor at the perfect height and position while freeing the desk space the stand occupied. On small student desks, this reclaimed space matters — it is the difference between a cramped corner and a workable station. Check your desk thickness and the monitor’s VESA mount compatibility (most monitors have standard 75×75 or 100×100 mounting holes; some ultra-budget models do not — verify before buying the arm).
Cable management is not vanity — tangled cables snag, disconnect and collect dust. A $10 pack of adhesive cable clips and five minutes of routing transforms the setup. Run cables behind the desk, bundle the excess with velcro ties, and keep the power board accessible (you will need to reach it). For renters, adhesive clips beat drilling every time — no bond deductions.
Software Tricks for Multi-Monitor Studying
Hardware is half the setup — these software habits complete it:
- Window snapping: On Windows, Win+Left/Right snaps a window to half a screen; on Mac, use Split View or a free tiling tool. Two snapped windows per monitor gives you four visible work areas.
- Virtual desktops: Beyond physical screens, virtual desktops (Win+Tab on Windows, Mission Control on Mac) let you separate contexts — one desktop for the current essay, another for the lecture, a third for admin. Fewer visible windows means fewer distractions.
- Dedicate screens by role: Keep communication (email, chat, class) on the secondary screen and deep work on the primary. When writing, the secondary screen goes dark or shows only reference material — no social media on a screen you can see while working.
- Wallpaper differentiation: Different wallpapers per monitor sounds cosmetic, but it helps your brain instantly know which screen is which when glancing up.
- Night light on both screens: Enable blue-light filtering on the external monitor too, not just the laptop — mismatched colour temperatures cause eye fatigue.
Dual Monitors for Exams, Presentations and Group Work
Specific situations deserve specific setups. For online exams, check the rules first — some proctored exams require a single screen or forbid secondary displays. If allowed, put the exam on the primary screen and your permitted materials (or the proctoring window) on the secondary. For presentations, the classic arrangement is slides on the shared screen and your speaker notes on the other — the audience never sees your notes, and you never look down at paper. For group work, video call on one screen and the collaborative document on the other keeps you engaged in both. The through-line: decide each screen’s job before the session starts, not during it.
When One Big Monitor Beats Two
Two screens are not the only answer. A single large monitor (27–32″, 1440p or 4K) with good window management suits some students better — no bezel gap in the middle, simpler cabling, and easier on small desks. Ultrawide monitors (34″, 21:9 aspect) are effectively two screens without the gap and are superb for side-by-side documents. The trade-offs are cost (ultrawides start where dual budget setups end) and flexibility (you cannot take half an ultrawide to the library). For most students on a budget, laptop-plus-one-monitor remains the value winner — but if you find a good deal on a large single display, do not feel you are missing out.
Troubleshooting Common Dual-Monitor Issues
- “No signal” on the monitor: Check the monitor’s input source matches the cable (HDMI 1 vs HDMI 2), try a different cable, and confirm the laptop detects the display (Win+P on Windows).
- Wrong resolution/blurry text: Set the monitor to its native resolution in display settings. If text is still fuzzy, check you are using a digital connection (HDMI/DP/USB-C), not VGA.
- Mouse moves the wrong way between screens: Rearrange the display rectangles in settings to match the physical layout.
- Laptop overheats with lid closed: Most laptops vent through the keyboard area — running closed (clamshell mode) can trap heat. Keep the lid open on a stand instead, using both screens.
- USB-C monitor not detected: Try a different USB-C port (only some support video output) and confirm the cable supports DisplayPort Alt Mode.
- Flickering: Usually a faulty cable or loose connection. Swap the cable before suspecting the monitor.